Showing posts with label Hexagon. Show all posts

Thursday, September 5, 2013

Hexie Nook HD Cover - Tutorial Thursday

Welcome to Tutorial Thursdays!

Sew Simply
Cover Tute Pin
I got the idea to make a cover for my Nook HD.  I have a Lily Pulitzer cover that my mom gave me, but I want to make my own quilted one - and probably one for her too.

So here are my measurements The nook itself is 5" x 7-3/4"  Since my nook is about half an inch thick, and it needs to have a cover plus room for the quilting and lining, I'm going to double the width and add 2 inches. (5" x 2 = 10" + 2" = 12"), The height, I'll add 3/4" to make sure I have room for the elastic to hold the thing in, the dimensions of my quilted cover will be 12" x 8-1/2".

Materials Needed:
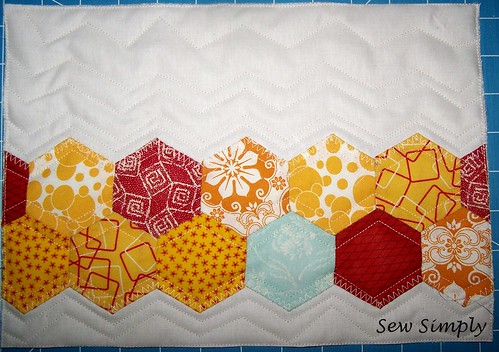
  • Quilted piece for the front conforming to the measurements we calculated above. (mine is 12" x 8.5")
  • 2 coordinating pieces for the lining which are cut 1/2" narrower and the same in height (instead of 12" cut 11.5" x 8.5")
  • A 1-1/2" WOF strip for binding 
  • Scraps for closure and pocket (pocket optional)
  • Velcro for closure
  • Elastic
  • Sewing Machine, Needle and Thread, and a lot of creativity!
All seams are 1/4" unless otherwise noted.
I chose to use a 12.5" quilt block that I already had constructed.  I quilted it and trimmed it to the size I noted above. 

Quilted

Creating the Closure

The next thing I did was create the closure.  You can choose any closure type you like, but I did a simple strap and velcro setup.  NOTE: You need to attach the closure BEFORE you attach the lining since the velcro is attached directly to the cover.

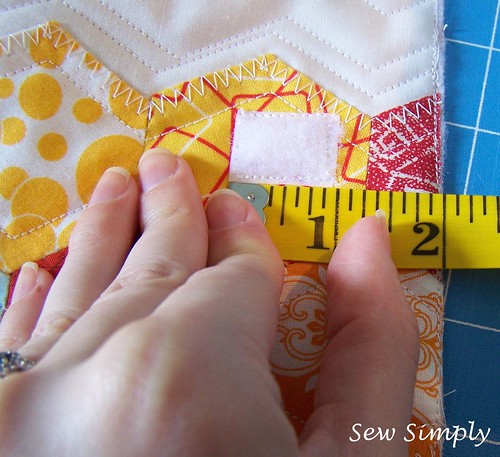
With the outside facing up (the right side of the quilt), the front of the cover is on the right.  Attach half of the velcro to this side.  Be sure to measure in from the edge a good two inches (as shown), and make sure the closure will be centered vertically.

velcro measure

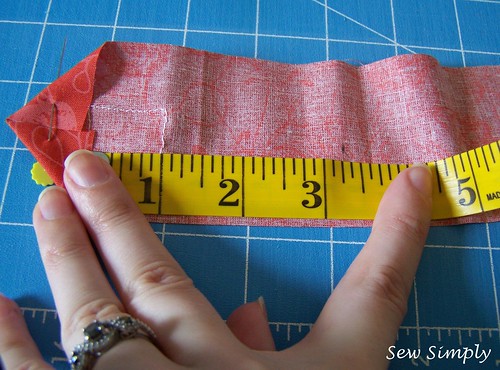
Cut out two pieces of fabric of choice for closure. I cut mine about 2 inches longer than the distance from the edge on the front (2" + 2" = 4" long). Attach the other half of the velcro to the right side of one of the pieces.

Strap Construction

Sew the two pieces together, right sides facing each other.  Do not close in the flat edge (as shown below), that is how you will turn your strap right side out and attach it to the cover.  After it's stitched, you can trim up some of the fabric to reduce bulk once it's turned right side out, reduce bulk in any way desired - after this picture, I snipped off the point on my strap.

Strap Stitched

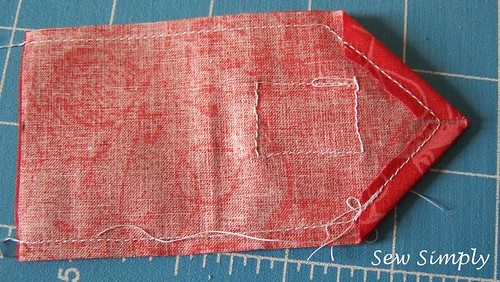
Attach the closure to the "back" of the cover (the left side) as shown. Now let's move to the lining.

Strap attachment

Making the Lining

For the lining, I used two pieces of the same blue fabric that the single blue hexagon is made from. Again, I cut them 1/2" shorter than the cover itself to create the pocket openings in the middle.

Lining unstitched

From here on out I used photos from a second cover that I made ---

If you desire: Use a light to medium interfacing inbetween the two halves of the lining (inside the fold).

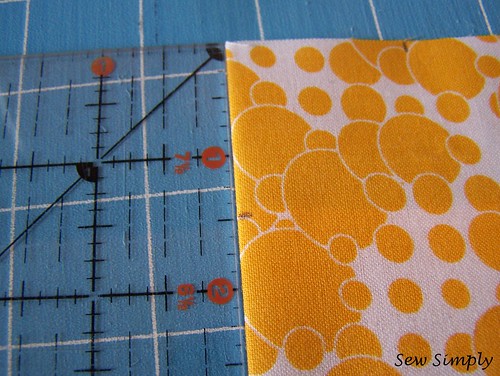
For the e-reader side: measure 1.5 inches in from all corners as shown below. This is your guide for attaching the elastic.

Measures

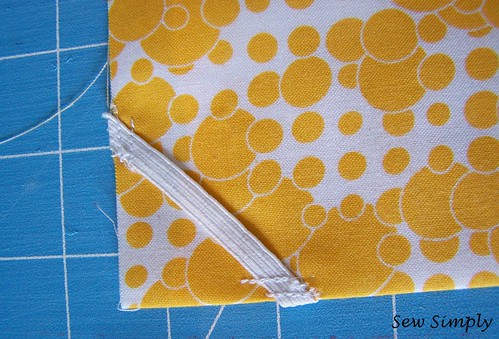
On all sides except the folded side (which will be the only side that is not covered with binding) stitch the elastic at 1/8" and 1/4" in.  This will help prevent the edges from folding in.

Elastic

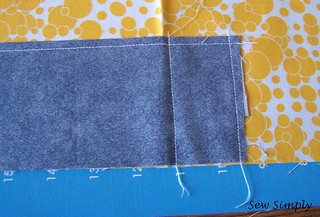
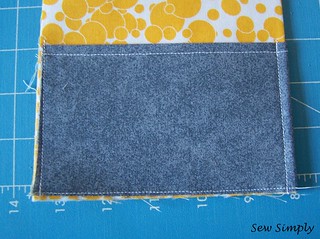
For the other side - I attached a simple pocket I salvaged from my scraps (optional).  I used these steps to construct it:

Pocket
This piece was a wider piece that I pressed in half and edge-stitched with a 1/4" seam.

Pocket2
I placed a seam near the folded part of the lining piece and another one further in to secure it.  Refold the fabric in half to finish attaching the pocket.

Attached Pocket
I used a rough 1/8" seam here, just to seal the bottom and side of the pocket.

Next, pin the two pieces of lining to the quilted outside cover. NOTE: Make sure you are pinning them to the correct sides.

Pins

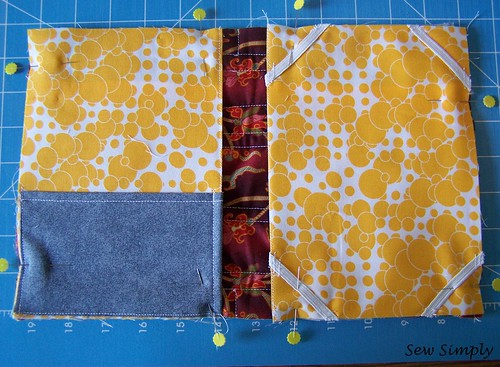
Stitch the lining all the way around the whole cover (back-stitch if you want) with a 1/4" seam.

Bind with the 1.5" WOF strip.

Binding

And you're done! If you have any questions at all about this tutorial, feel free to leave them as a comment, or email them directly to me here.

Thanks for reading, and please share pics of your covers with me in my Flickr Group. I would love to see them!  :)

- Cassie 

Sew Simply

Now I'd like to see your tutorials and projects - Link up!

Friday, August 23, 2013

First HEX experience

I'm so excited that I finally decided to do my hexie blocks.  The first one is finished and it came out very pretty, I think. I decided to make my own hexie templates from the one that was in the class materials on the Craftsy class.

Templates

I was afraid the regular printer paper was going to be too flimsy, but it worked out okay.  I'm glad I cut the template out of a cardboard piece I snagged from a FQ, now I'll have it to make more paper pieces later.

Cut

I stitched them all together last night while my husband and I watched a movie.  Not many pictures occurred during this time.  :)

Pins

I can't say how much I love those little flat flower pins.

Finished Hex Block

I machine appliqued my hexie stripe on with a zig-zag pattern.  Warm with one cool hex.  So, that block is finished - now I'm going to hope for my local quilting shop to carry more kona snow fabric so I can finish the rest of the series.. I wish the fabric fairy would bring me some solids!!

Studio Update! 

So, for a while, my studio has been a wreck.  Between all the home repairs and updates my husband and I are doing to our 103 year old house, my studio has become kind of a storage room.  Today, I got a bit of drive to clean up my fabric stash, and finally put it in its place - the awesome built in shelving unit in my studio. I was so excited because there is room in there to grow!

I wish that I had taken a before picture - my painting supplies were all over both the shelves, and it was generally a huge wreck.  I think as a general rule, there is never enough storage space, no matter where you live.  Don't you agree?

Storage

So, I'm calling both of these things my finishes for the week, baby steps, you know!

Linking up with Crazy Mom Quilts for Finish it up Friday
And Thank Goodness it's Finished Friday this week at Sewing By Moonlight.

Thanks for reading, lovelies.
Cassie

Friday, August 16, 2013

5 Hexagon Project Tutorials

Hexagon Pin
Here you will find a list of 5 of my favorite Hexagon projects and tutorials.  As I've been perusing other people's blogs and work a lot lately, I thought I'd share these gems that I found.  I have linked directly to the original post (or where I found it originally), and have done my best to give credit where credit is due. 
Strip of Hexies Dish Towel by Wild Olive

Eye Glass Case by Liesl Made
Hexagon Park on Moda Bake Shop by Lily's Quilts
Hexagon Quilt Tutorial by The Sewing Chick


Stitchy Hexie with Embroidery Pattern by Clover and Violet
Thank you original authors for your hard work, and for sharing it with us! 

Thanks for reading,
Cassie