Showing posts with label Tutorial Thursdays. Show all posts
Showing posts with label Tutorial Thursdays. Show all posts
Thursday, September 12, 2013
Tutorial Thursdays
Welcome to Tutorial Thursdays! This week I want to share one of the very first tutorials I ever did.. it's from Vanessa the Crafty Gemini. She makes things so easy to understand, and I definitely love video tutorials! I hope you take the time to check out this video - and make one!
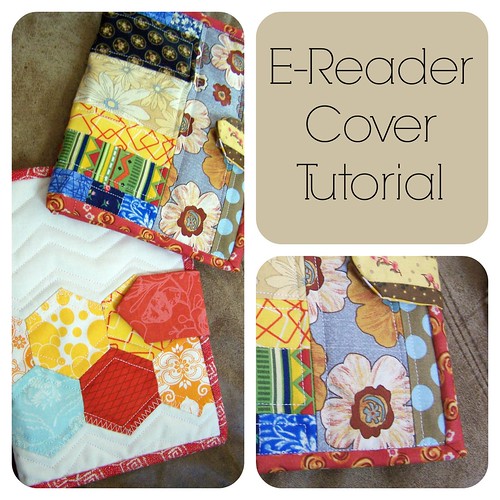
Here is a photo of my cover that I made about a year ago when I first started sewing/quilting. I've improved GREATLY since then, but it's nice to think that my very first concern was to take care of and protect my sewing machine.
Please hop on over to her page and youtube channel and check out the other great tutorials she has!
YouTube Channel
Crafty Gemini
Other News:
I have been thinking about how to get participation up for this - I think I'm going to ask for others to "host" Tutorial Thursdays, and promote their blogs from here. Thoughts? Any takers?
Now for the linkup:
Thursday, September 5, 2013
Hexie Nook HD Cover - Tutorial Thursday
Welcome to Tutorial Thursdays!
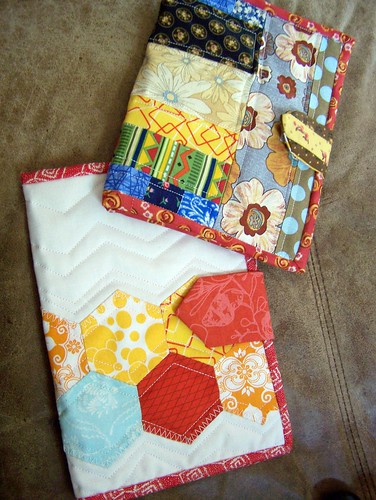
 I got the idea to make a cover for my Nook HD. I have a Lily Pulitzer cover that my mom gave me, but I want to make my own quilted one - and probably one for her too.
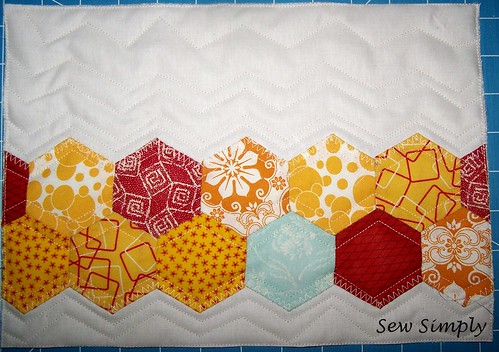
So here are my measurements The nook itself is 5" x 7-3/4" Since my nook is about half an inch thick, and it needs to have a cover plus room for the quilting and lining, I'm going to double the width and add 2 inches. (5" x 2 = 10" + 2" = 12"), The height, I'll add 3/4" to make sure I have room for the elastic to hold the thing in, the dimensions of my quilted cover will be 12" x 8-1/2".
Materials Needed:
Creating the Closure
The next thing I did was create the closure. You can choose any closure type you like, but I did a simple strap and velcro setup. NOTE: You need to attach the closure BEFORE you attach the lining since the velcro is attached directly to the cover.
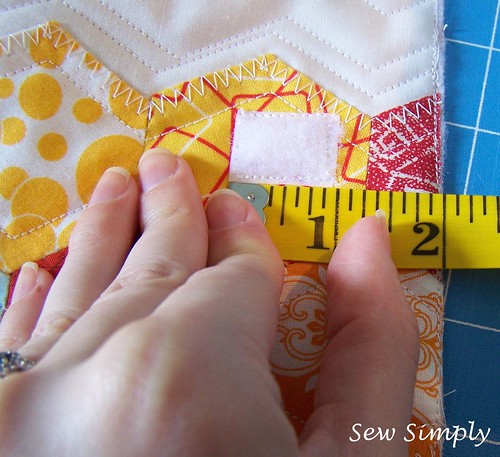
With the outside facing up (the right side of the quilt), the front of the cover is on the right. Attach half of the velcro to this side. Be sure to measure in from the edge a good two inches (as shown), and make sure the closure will be centered vertically.
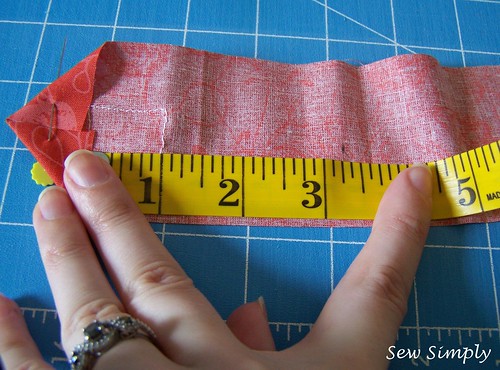
Cut out two pieces of fabric of choice for closure. I cut mine about 2 inches longer than the distance from the edge on the front (2" + 2" = 4" long). Attach the other half of the velcro to the right side of one of the pieces.
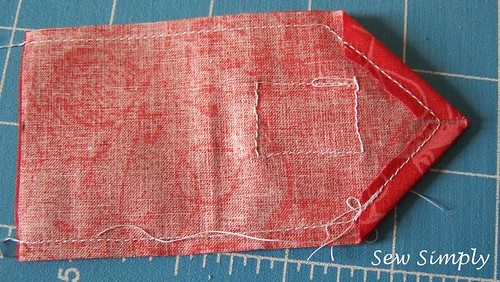
Sew the two pieces together, right sides facing each other. Do not close in the flat edge (as shown below), that is how you will turn your strap right side out and attach it to the cover. After it's stitched, you can trim up some of the fabric to reduce bulk once it's turned right side out, reduce bulk in any way desired - after this picture, I snipped off the point on my strap.
Attach the closure to the "back" of the cover (the left side) as shown. Now let's move to the lining.
Making the Lining
For the lining, I used two pieces of the same blue fabric that the single blue hexagon is made from. Again, I cut them 1/2" shorter than the cover itself to create the pocket openings in the middle.
From here on out I used photos from a second cover that I made ---
If you desire: Use a light to medium interfacing inbetween the two halves of the lining (inside the fold).
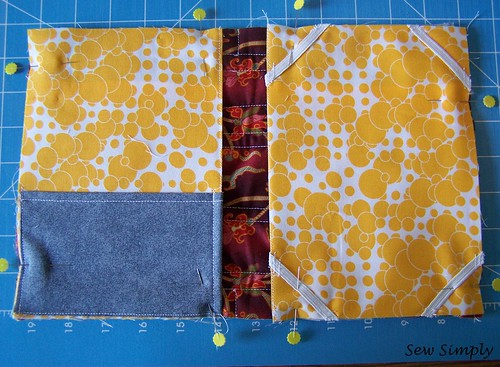
For the e-reader side: measure 1.5 inches in from all corners as shown below. This is your guide for attaching the elastic.
On all sides except the folded side (which will be the only side that is not covered with binding) stitch the elastic at 1/8" and 1/4" in. This will help prevent the edges from folding in.
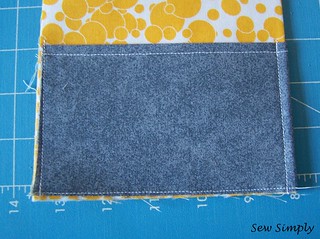
For the other side - I attached a simple pocket I salvaged from my scraps (optional). I used these steps to construct it:
This piece was a wider piece that I pressed in half and edge-stitched with a 1/4" seam.
I placed a seam near the folded part of the lining piece and another one further in to secure it. Refold the fabric in half to finish attaching the pocket.
I used a rough 1/8" seam here, just to seal the bottom and side of the pocket.
Next, pin the two pieces of lining to the quilted outside cover. NOTE: Make sure you are pinning them to the correct sides.
Stitch the lining all the way around the whole cover (back-stitch if you want) with a 1/4" seam.
Bind with the 1.5" WOF strip.
And you're done! If you have any questions at all about this tutorial, feel free to leave them as a comment, or email them directly to me here.
Thanks for reading, and please share pics of your covers with me in my Flickr Group. I would love to see them! :)

Now I'd like to see your tutorials and projects - Link up!

So here are my measurements The nook itself is 5" x 7-3/4" Since my nook is about half an inch thick, and it needs to have a cover plus room for the quilting and lining, I'm going to double the width and add 2 inches. (5" x 2 = 10" + 2" = 12"), The height, I'll add 3/4" to make sure I have room for the elastic to hold the thing in, the dimensions of my quilted cover will be 12" x 8-1/2".
Materials Needed:
- Quilted piece for the front conforming to the measurements we calculated above. (mine is 12" x 8.5")
- 2 coordinating pieces for the lining which are cut 1/2" narrower and the same in height (instead of 12" cut 11.5" x 8.5")
- A 1-1/2" WOF strip for binding
- Scraps for closure and pocket (pocket optional)
- Velcro for closure
- Elastic
- Sewing Machine, Needle and Thread, and a lot of creativity!
Creating the Closure
The next thing I did was create the closure. You can choose any closure type you like, but I did a simple strap and velcro setup. NOTE: You need to attach the closure BEFORE you attach the lining since the velcro is attached directly to the cover.
With the outside facing up (the right side of the quilt), the front of the cover is on the right. Attach half of the velcro to this side. Be sure to measure in from the edge a good two inches (as shown), and make sure the closure will be centered vertically.
Cut out two pieces of fabric of choice for closure. I cut mine about 2 inches longer than the distance from the edge on the front (2" + 2" = 4" long). Attach the other half of the velcro to the right side of one of the pieces.
Sew the two pieces together, right sides facing each other. Do not close in the flat edge (as shown below), that is how you will turn your strap right side out and attach it to the cover. After it's stitched, you can trim up some of the fabric to reduce bulk once it's turned right side out, reduce bulk in any way desired - after this picture, I snipped off the point on my strap.
Attach the closure to the "back" of the cover (the left side) as shown. Now let's move to the lining.
Making the Lining
For the lining, I used two pieces of the same blue fabric that the single blue hexagon is made from. Again, I cut them 1/2" shorter than the cover itself to create the pocket openings in the middle.
From here on out I used photos from a second cover that I made ---
If you desire: Use a light to medium interfacing inbetween the two halves of the lining (inside the fold).
For the e-reader side: measure 1.5 inches in from all corners as shown below. This is your guide for attaching the elastic.
On all sides except the folded side (which will be the only side that is not covered with binding) stitch the elastic at 1/8" and 1/4" in. This will help prevent the edges from folding in.
For the other side - I attached a simple pocket I salvaged from my scraps (optional). I used these steps to construct it:
This piece was a wider piece that I pressed in half and edge-stitched with a 1/4" seam.
I placed a seam near the folded part of the lining piece and another one further in to secure it. Refold the fabric in half to finish attaching the pocket.
I used a rough 1/8" seam here, just to seal the bottom and side of the pocket.
Next, pin the two pieces of lining to the quilted outside cover. NOTE: Make sure you are pinning them to the correct sides.
Stitch the lining all the way around the whole cover (back-stitch if you want) with a 1/4" seam.
Bind with the 1.5" WOF strip.
And you're done! If you have any questions at all about this tutorial, feel free to leave them as a comment, or email them directly to me here.
Thanks for reading, and please share pics of your covers with me in my Flickr Group. I would love to see them! :)
- Cassie

Now I'd like to see your tutorials and projects - Link up!
Thursday, August 29, 2013
Tutorial Thursdays
Today has been crazy! My husband and I are working on financing for our first home - needless to say, I have not really thought about doing tutorial thursdays, until just now. I would still like to open up the link-up, though!
Up next week: Tutorial for a Nook HD (or any other e-reader) cover. Stay tuned!
Now, share what you've been working on!
Thanks for reading,
Cassie
Up next week: Tutorial for a Nook HD (or any other e-reader) cover. Stay tuned!
Now, share what you've been working on!
Thanks for reading,
Cassie
Thursday, August 22, 2013
Tutorial Thursdays!
Grab a badge for your blog here:

So, this week I've been kind of lazy. My husband and I started watching Breaking Bad (from the beginning), and that has distracted me - so I've only been working on the Craftsy BOM from 2012. I blogged about it yesterday, in fact!
I have to say that Craftsy's BOM class - for the sake of Tutorial Thursdays, we'll call it a tutorial "series" - has been very good so far. I have not really learned a new technique, but it has been good practice, and I've been forced to kind of think about color matching as I go along, rather than just having all the fabric for the entire project laid out at the start (I went with the stash rather than purchasing a new bundle..)
That being said, I'm NOT going to actually post the tutorial, since I can't. You have to register on Craftsy to actually take any of their classes (it's free to register). However, I will post my finished broken spider web block :)
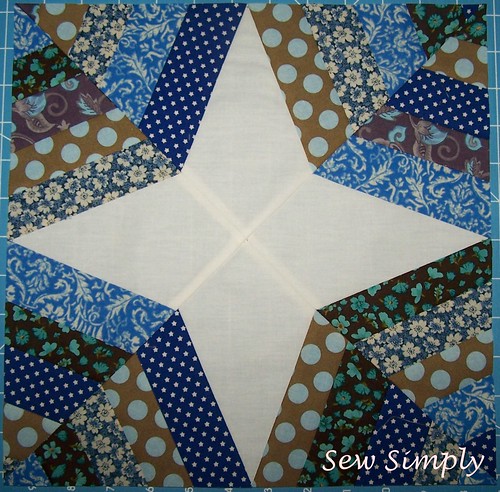
I just hate that my final point was off by like 1/8 of an inch.... I might unpick some of the stitches and try to fudge it a little. I haven't decided yet - have any of you had any success with doing that? Yes, it is a string block, so none of the seams are supposed to match other than around the center star.
Hopefully next week I'll have a better tutorial for y'all. Until then, share what you've been working on from a tutorial (or your own tutorial)!
Thanks for reading!
Cassie

So, this week I've been kind of lazy. My husband and I started watching Breaking Bad (from the beginning), and that has distracted me - so I've only been working on the Craftsy BOM from 2012. I blogged about it yesterday, in fact!
I have to say that Craftsy's BOM class - for the sake of Tutorial Thursdays, we'll call it a tutorial "series" - has been very good so far. I have not really learned a new technique, but it has been good practice, and I've been forced to kind of think about color matching as I go along, rather than just having all the fabric for the entire project laid out at the start (I went with the stash rather than purchasing a new bundle..)
That being said, I'm NOT going to actually post the tutorial, since I can't. You have to register on Craftsy to actually take any of their classes (it's free to register). However, I will post my finished broken spider web block :)

I just hate that my final point was off by like 1/8 of an inch.... I might unpick some of the stitches and try to fudge it a little. I haven't decided yet - have any of you had any success with doing that? Yes, it is a string block, so none of the seams are supposed to match other than around the center star.
Hopefully next week I'll have a better tutorial for y'all. Until then, share what you've been working on from a tutorial (or your own tutorial)!
Thanks for reading!
Cassie
Friday, August 16, 2013
Finished Pressing Table + Tutorial
Earlier this week I blogged about the table that my mom gave me that I was going to turn into my pressing table (here). I finally decided which fabric I wanted to use, so as promised, here is my process for repurposing the table.
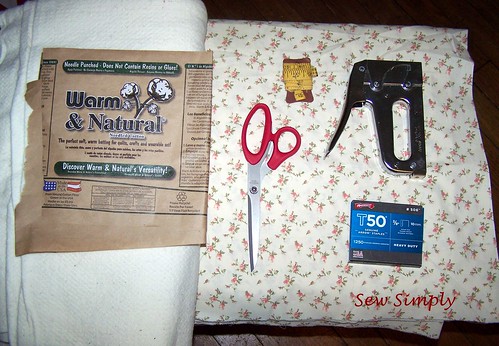
So, obviously, you need a table - the top doesn't need to be in good condition (it'll be covered!), but it needs to be sturdy. Here are the other supplies you'll need:
I used 3/8" staples - they worked just fine.
The fabric is a heavy cotton, but not quite a decorator weight.
Since you'll most likely be ironing cotton on your pressing board, you want to use a cotton batting for the pad.
The first thing you want to do is sweep! Make sure your floor is pretty clean. I have OLD wooden floors, so dirt gets trapped in the cracks, but make sure the surface you'll be laying your materials on is fairly clean.
Measure the table. Write this down. You'll be adding inches to this measurement for the padding and cover.
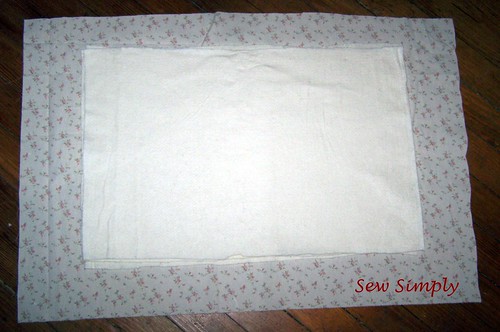
Cutting the fabric piece. Depending on the height of the table top (the thickness of the piece on top that you'll be stapling to), you'll want to give yourself between 2"-5" extra fabric on all sides. I was not very comfortable with the whole process, so I gave myself a lot extra - about 4" on all sides. Place this face down on the floor.
Cutting the padding. I cut 3 pieces of batting - I like a fairly firm surface to press on, but you can cut more if you like yours softer. I cut my pieces 1" over on all sides, enough to go around the edge of my table - no one likes a crease in their fabric from the edge of their pressing board. Place these centered on top of the already face down fabric piece as shown here:
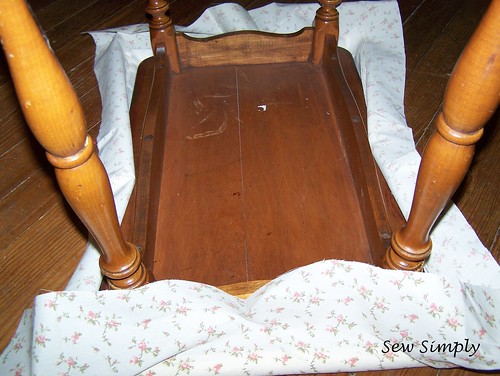
Next you'll place the table top down on the stack you just made. Without pulling the stack out of place, place a single staple on one side of the table. Once this staple is in place, move the opposite side of the table. Pull this side tight, and place another staple. Repeat for the remaining sides.
Continue pulling tight and stapling every 1"-2". Stop an inch or two away from each corner. Corners are last.
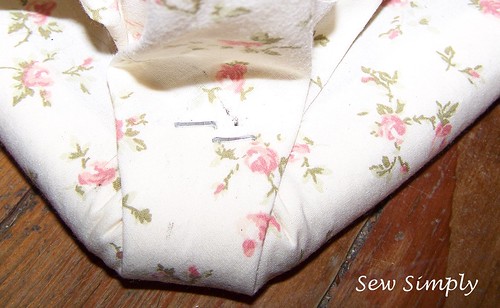
For the corners: pull the fabric tight, parallel to the leg. Depending on how round the corners of your table are, you will have a sharp point, or a flat one like mine.
Double staple the fabric as flush as you can get it to lay on the corner. Pulling the fabric tight and stapling it will ensure that you don't end up with bubbles in your pressing surface. Since I borrowed the stapler from my husband's tool box, it left some dirty spots around my staples - but I'm not that worried about it, they are on the bottom.
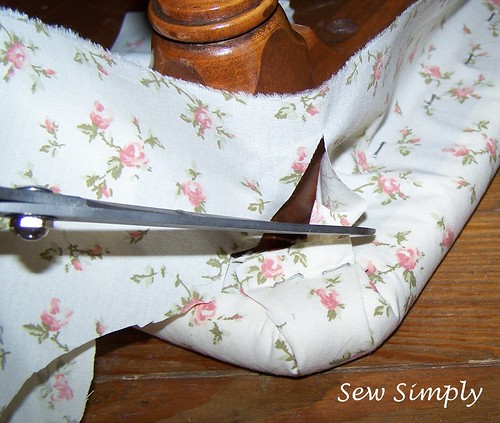
Just trim up the excess fabric, and you're finished!
++++
Thanks for reading!!
-Cassie
Thursday, August 15, 2013
HST Tutorial (Tutorial Thursdays #2)
Good morning everyone! This week I'm going to show you my amazing magical HST trick, it's probably not new, but I think pictures and a written set of instructions help. At the end I really want to see what you guys have been working on as far as projects from a tutorial - or even your own tutorial! I'm very new to quilting, so I will definitely try out whatever you share with me, then come back and show you what I've done.
So I'm going to get on with it.
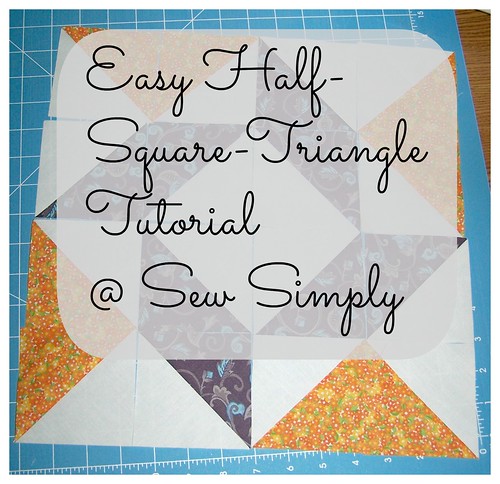
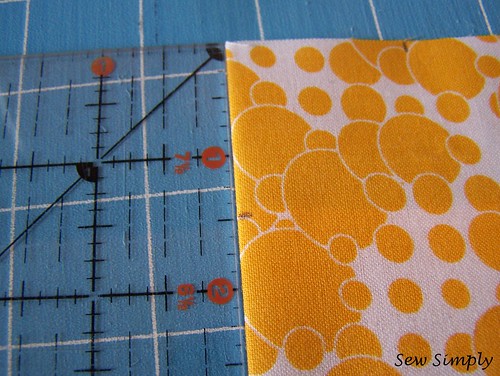
The first thing to remember is that we're going to be sewing together 2 squares all the way around the edge with a 1/4" seam, closing them in together. You want to start with two squares that are 2 inches larger than the size of your HST. Each set of two squares will yield 4 HSTs. I made 3.5" HSTs so I started with 5.5" squares of fabric.
Materials for 4 HSTs:
Two blocks of material 2" larger than the desired size of your HST.
Rotary cutter
Mat
Ruler
Sewing Machine
Directions:
Next take the blocks to the machine. Start about 1/4" away from a corner (doesn't matter which, we're going to go all the way around this puppy.) With your needle down, turn the corner 1/4" away from the end of each side. Don't worry if you go over a little - I just backstitched a few stitches and turned. The important thing is maintaining a good 1/4" border around the entire block.
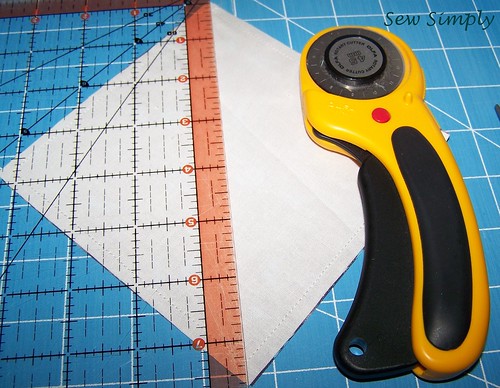
After you're done stitching around all 4 sides, take the block to the cutting mat. Line up your ruler diagonally from one corner to the corner across from it. Cut. Flip the triangles and cut again - to get what looks like a QST with all 4 closed.
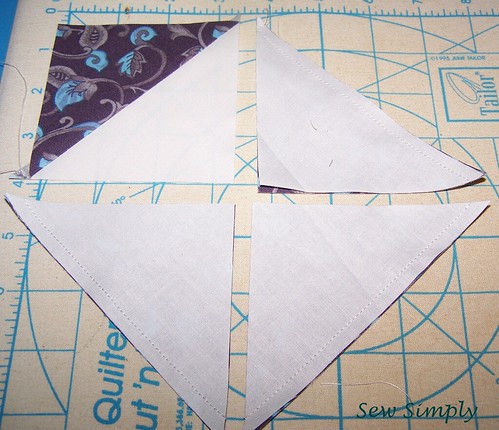
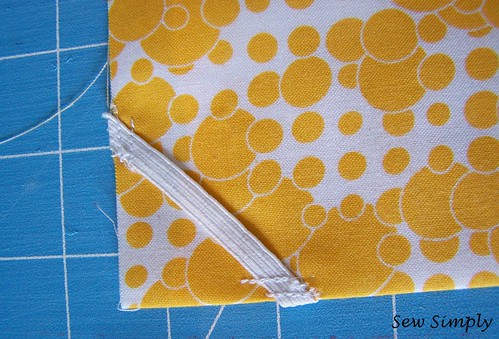
Then, press. *Enter Darth Vader* Quilters always press to the dark side. :) Trim the dog ears, and then you are finished constructing your HST.
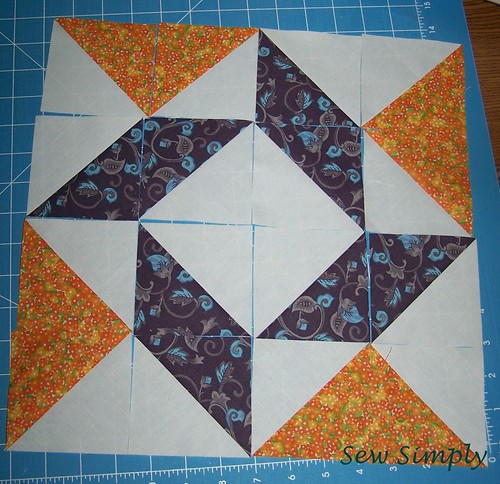
Tutorial Thursdays - A New Linky Party
Please be sure and link back to my blog in your post, using either my button (below) or a text link. <3 data-blogger-escaped-br=""> Grab my button!

So I'm going to get on with it.

The first thing to remember is that we're going to be sewing together 2 squares all the way around the edge with a 1/4" seam, closing them in together. You want to start with two squares that are 2 inches larger than the size of your HST. Each set of two squares will yield 4 HSTs. I made 3.5" HSTs so I started with 5.5" squares of fabric.
Materials for 4 HSTs:
Two blocks of material 2" larger than the desired size of your HST.
Rotary cutter
Mat
Ruler
Sewing Machine
Directions:
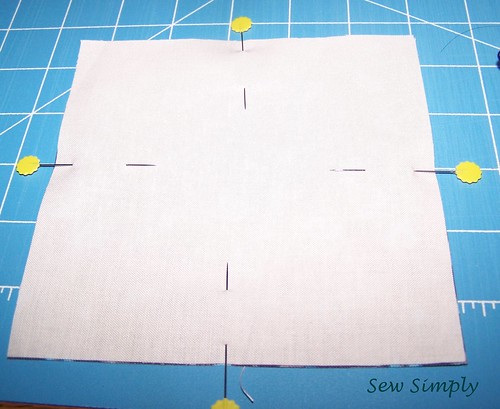
The first obvious step is to pin your squares together. This will keep them from shifting when you are sewing all the way around the edges.
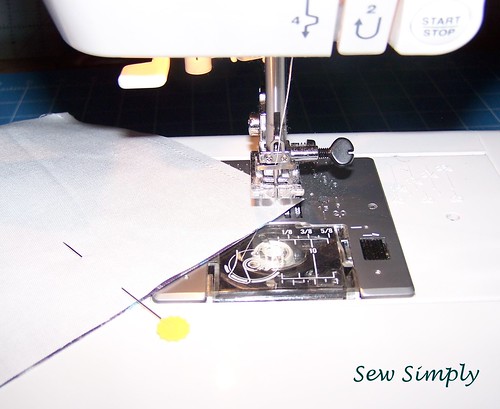
Next take the blocks to the machine. Start about 1/4" away from a corner (doesn't matter which, we're going to go all the way around this puppy.) With your needle down, turn the corner 1/4" away from the end of each side. Don't worry if you go over a little - I just backstitched a few stitches and turned. The important thing is maintaining a good 1/4" border around the entire block.
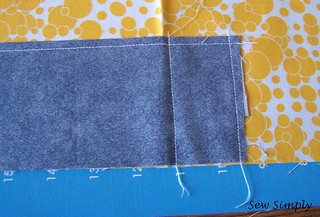
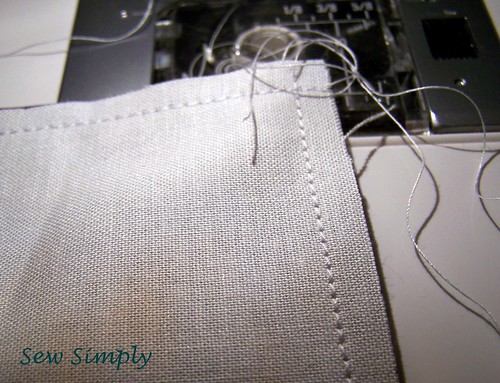
This is what my corners looked like. Maintain the 1/4" seam around the whole edge and you'll be fine.

After you're done stitching around all 4 sides, take the block to the cutting mat. Line up your ruler diagonally from one corner to the corner across from it. Cut. Flip the triangles and cut again - to get what looks like a QST with all 4 closed.

Then, press. *Enter Darth Vader* Quilters always press to the dark side. :) Trim the dog ears, and then you are finished constructing your HST.

I found this method to be much quicker than the traditional HST method. I think you will too. Plus you don't end up with a mark on your fabric.
Tutorial Thursdays - A New Linky Party
Please be sure and link back to my blog in your post, using either my button (below) or a text link. <3 data-blogger-escaped-br=""> Grab my button!

Thursday, August 8, 2013
Tutorial Thursdays - WEEK 1
So, I got a novel idea today. There are all these great tutorials that people do - I want to know what you guys are working on. As a fairly new face to the sewing/quilting game, I realize that I might be recreating the wheel here. There are tons of compilation blogs of tutorials (i.e. Moda Bake Shop, etc.), but I want to see your work.
Here is my promise: every week (after this one - because, of course, I only thought of this after Thursday started!) I'll post a linkup that starts at 12:00 am CST, and ends at 11:55 pm CST.
The only rules are: you must comment on the few links before your own, and to have fun. Of course, copyright stuff should be honored and credit should be given where they're due.
Here's what you can post: If you have your own tutorial that you made for your readers, you can post it in my weekly link-up: Tutorial Thursdays. If you are working on someone else's tutorial, you can link up a post on your progress. Just be sure to give the original author of the tutorial credit!
So, to kick things off: I'll post a link to a tutorial that I'm working on - I don't think that I'm skilled enough to create my own tutorial yet.
This is Anchors Aweigh by Tula Pink. I am creating it for my little brother who is about to end his time in the US Coast Guard. I talked about in a previous post that I got my hands on a few of his old uniforms, and I'll be incorporating those into the quilt. The anchor will be shades of blue...
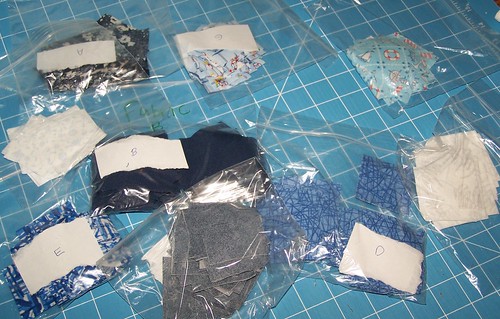
Here are the squares... ALL of the squares. The darkest blue (fabric B) squares are cut from his uniforms.
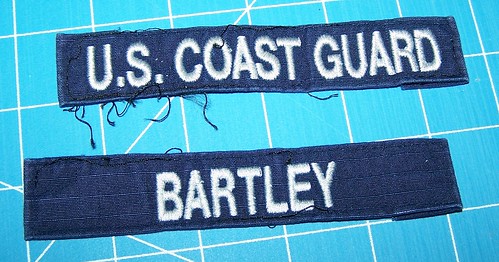
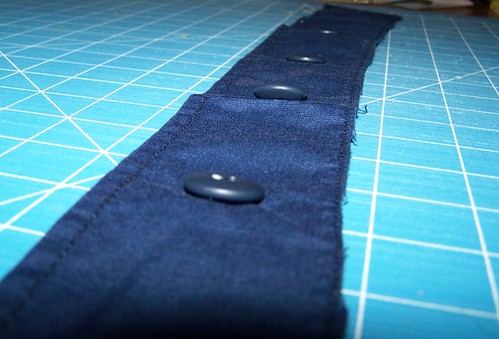
Since his uniforms have all these embellishments:
I really want to incorporate those as well.. Please leave me any suggestions you have for incorporating those in the comments below. I have about 5 uniform shirts which have all of the above embellishments.
Lastly, since it's to honor military service, I plan to use red and white solids as the negative space fabrics.
Honestly, after it's done, I might just keep it for myself. ;-) Or make another in Tula Pink's fabrics that it was designed for! I just need to get my hands on them.
Thanks for reading!
Cassie
Okay, so here's my favorite part: show me what you're working on!!
Subscribe to:
Posts (Atom)


