Showing posts with label Tutorials by others. Show all posts
Showing posts with label Tutorials by others. Show all posts
Thursday, September 12, 2013
Tutorial Thursdays
Welcome to Tutorial Thursdays! This week I want to share one of the very first tutorials I ever did.. it's from Vanessa the Crafty Gemini. She makes things so easy to understand, and I definitely love video tutorials! I hope you take the time to check out this video - and make one!
Here is a photo of my cover that I made about a year ago when I first started sewing/quilting. I've improved GREATLY since then, but it's nice to think that my very first concern was to take care of and protect my sewing machine.
Please hop on over to her page and youtube channel and check out the other great tutorials she has!
YouTube Channel
Crafty Gemini
Other News:
I have been thinking about how to get participation up for this - I think I'm going to ask for others to "host" Tutorial Thursdays, and promote their blogs from here. Thoughts? Any takers?
Now for the linkup:
Wednesday, August 28, 2013
Nearly... there.....
So, I've been really busy again this week - not necessarily quilting though (unfortunately). I did get a few more blocks done for my Craftsy (2012) BOM series. I'm definitely liking my choices of fabric more and more as I continue.
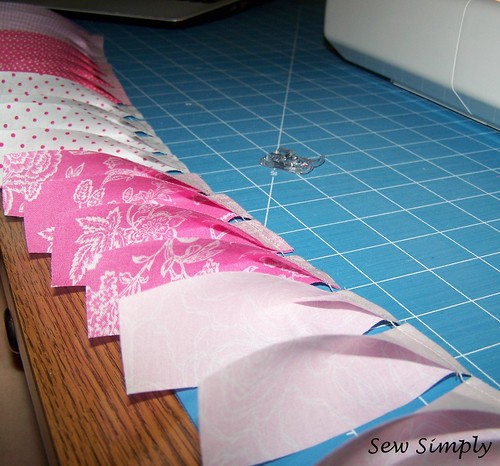
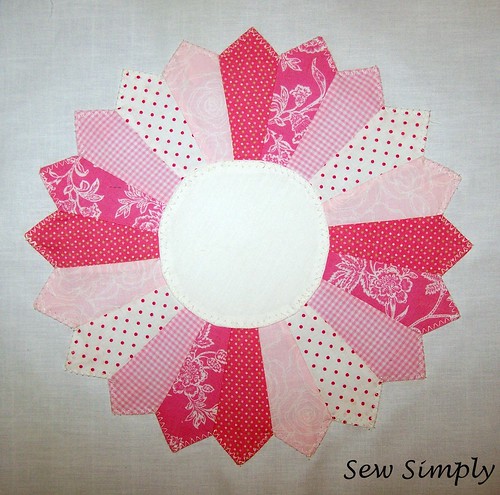
No matter what I tried, I could not get the white background fabric to show as white. Probably because I took it on my blue cutting mat (as I do with so many other things), and that is shining through the Kona Snow... oh well. Still not bad for my first Dresden ever.
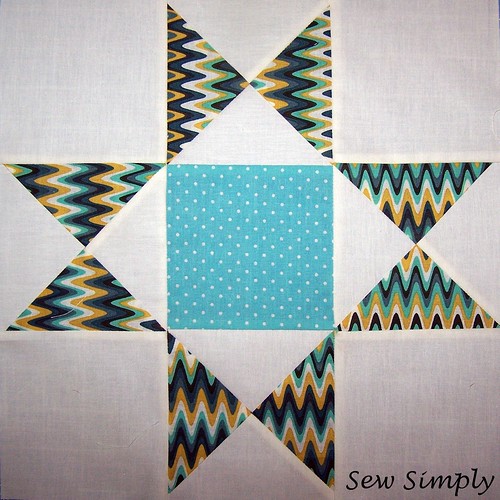
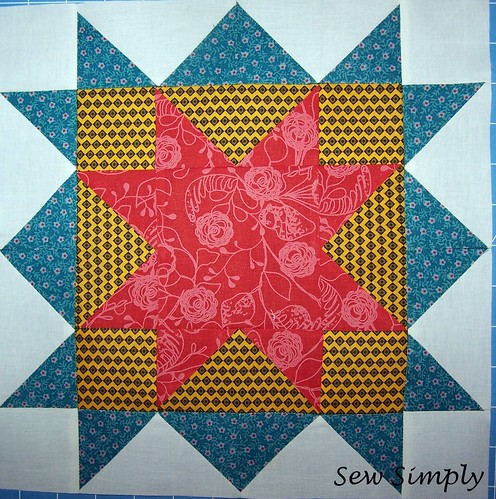
I'm still not completely satisfied with the points on this one.
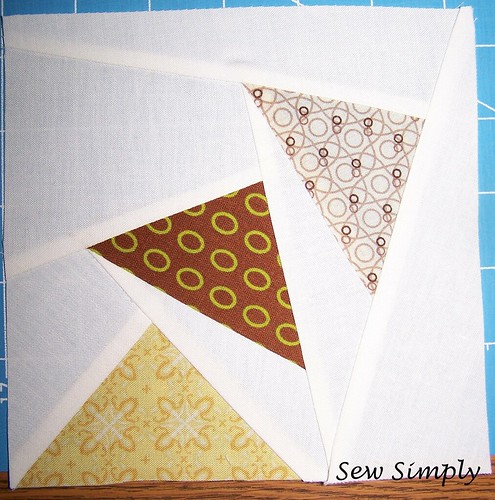
Lastly, my in progress circle of geese block. I should finish this one in the next hour, and hopefully the remainder of the blocks today or tomorrow (there are only 4 left!)
Lastly, be sure and come back tomorrow for Tutorial Thursdays! It's a link party where I'm sharing a tutorial, and asking you to do the same. :)


No matter what I tried, I could not get the white background fabric to show as white. Probably because I took it on my blue cutting mat (as I do with so many other things), and that is shining through the Kona Snow... oh well. Still not bad for my first Dresden ever.


I'm still not completely satisfied with the points on this one.

Lastly, my in progress circle of geese block. I should finish this one in the next hour, and hopefully the remainder of the blocks today or tomorrow (there are only 4 left!)
Lastly, be sure and come back tomorrow for Tutorial Thursdays! It's a link party where I'm sharing a tutorial, and asking you to do the same. :)

Friday, August 23, 2013
First HEX experience
I'm so excited that I finally decided to do my hexie blocks. The first one is finished and it came out very pretty, I think. I decided to make my own hexie templates from the one that was in the class materials on the Craftsy class.
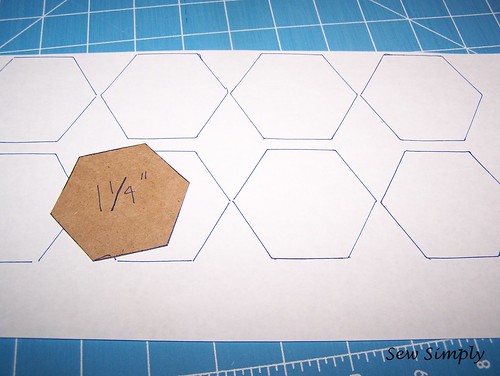
I was afraid the regular printer paper was going to be too flimsy, but it worked out okay. I'm glad I cut the template out of a cardboard piece I snagged from a FQ, now I'll have it to make more paper pieces later.
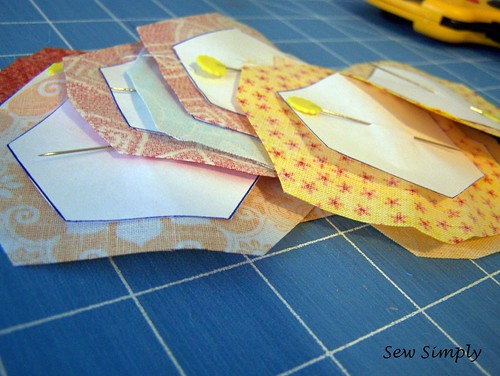
I stitched them all together last night while my husband and I watched a movie. Not many pictures occurred during this time. :)
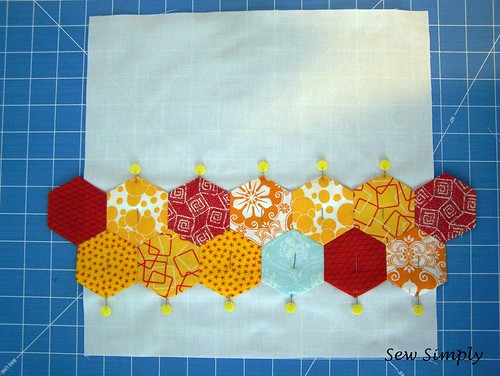
I can't say how much I love those little flat flower pins.

I machine appliqued my hexie stripe on with a zig-zag pattern. Warm with one cool hex. So, that block is finished - now I'm going to hope for my local quilting shop to carry more kona snow fabric so I can finish the rest of the series.. I wish the fabric fairy would bring me some solids!!
Studio Update!
So, for a while, my studio has been a wreck. Between all the home repairs and updates my husband and I are doing to our 103 year old house, my studio has become kind of a storage room. Today, I got a bit of drive to clean up my fabric stash, and finally put it in its place - the awesome built in shelving unit in my studio. I was so excited because there is room in there to grow!
I wish that I had taken a before picture - my painting supplies were all over both the shelves, and it was generally a huge wreck. I think as a general rule, there is never enough storage space, no matter where you live. Don't you agree?

So, I'm calling both of these things my finishes for the week, baby steps, you know!
Linking up with Crazy Mom Quilts for Finish it up Friday
And Thank Goodness it's Finished Friday this week at Sewing By Moonlight.
Thanks for reading, lovelies.
Cassie

I was afraid the regular printer paper was going to be too flimsy, but it worked out okay. I'm glad I cut the template out of a cardboard piece I snagged from a FQ, now I'll have it to make more paper pieces later.

I stitched them all together last night while my husband and I watched a movie. Not many pictures occurred during this time. :)

I can't say how much I love those little flat flower pins.

I machine appliqued my hexie stripe on with a zig-zag pattern. Warm with one cool hex. So, that block is finished - now I'm going to hope for my local quilting shop to carry more kona snow fabric so I can finish the rest of the series.. I wish the fabric fairy would bring me some solids!!
Studio Update!
So, for a while, my studio has been a wreck. Between all the home repairs and updates my husband and I are doing to our 103 year old house, my studio has become kind of a storage room. Today, I got a bit of drive to clean up my fabric stash, and finally put it in its place - the awesome built in shelving unit in my studio. I was so excited because there is room in there to grow!
I wish that I had taken a before picture - my painting supplies were all over both the shelves, and it was generally a huge wreck. I think as a general rule, there is never enough storage space, no matter where you live. Don't you agree?

So, I'm calling both of these things my finishes for the week, baby steps, you know!
Linking up with Crazy Mom Quilts for Finish it up Friday
And Thank Goodness it's Finished Friday this week at Sewing By Moonlight.
Thanks for reading, lovelies.
Cassie
Thursday, August 22, 2013
Tutorial Thursdays!
Grab a badge for your blog here:

So, this week I've been kind of lazy. My husband and I started watching Breaking Bad (from the beginning), and that has distracted me - so I've only been working on the Craftsy BOM from 2012. I blogged about it yesterday, in fact!
I have to say that Craftsy's BOM class - for the sake of Tutorial Thursdays, we'll call it a tutorial "series" - has been very good so far. I have not really learned a new technique, but it has been good practice, and I've been forced to kind of think about color matching as I go along, rather than just having all the fabric for the entire project laid out at the start (I went with the stash rather than purchasing a new bundle..)
That being said, I'm NOT going to actually post the tutorial, since I can't. You have to register on Craftsy to actually take any of their classes (it's free to register). However, I will post my finished broken spider web block :)
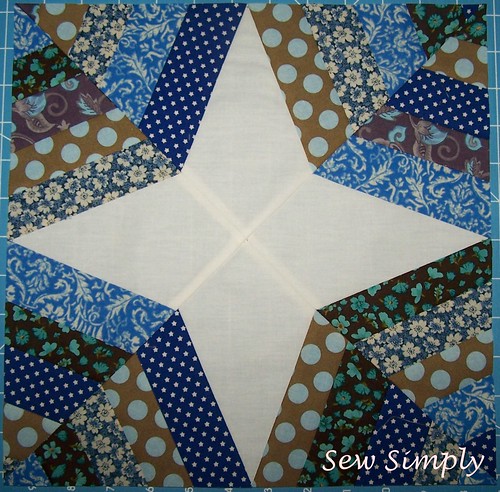
I just hate that my final point was off by like 1/8 of an inch.... I might unpick some of the stitches and try to fudge it a little. I haven't decided yet - have any of you had any success with doing that? Yes, it is a string block, so none of the seams are supposed to match other than around the center star.
Hopefully next week I'll have a better tutorial for y'all. Until then, share what you've been working on from a tutorial (or your own tutorial)!
Thanks for reading!
Cassie

So, this week I've been kind of lazy. My husband and I started watching Breaking Bad (from the beginning), and that has distracted me - so I've only been working on the Craftsy BOM from 2012. I blogged about it yesterday, in fact!
I have to say that Craftsy's BOM class - for the sake of Tutorial Thursdays, we'll call it a tutorial "series" - has been very good so far. I have not really learned a new technique, but it has been good practice, and I've been forced to kind of think about color matching as I go along, rather than just having all the fabric for the entire project laid out at the start (I went with the stash rather than purchasing a new bundle..)
That being said, I'm NOT going to actually post the tutorial, since I can't. You have to register on Craftsy to actually take any of their classes (it's free to register). However, I will post my finished broken spider web block :)

I just hate that my final point was off by like 1/8 of an inch.... I might unpick some of the stitches and try to fudge it a little. I haven't decided yet - have any of you had any success with doing that? Yes, it is a string block, so none of the seams are supposed to match other than around the center star.
Hopefully next week I'll have a better tutorial for y'all. Until then, share what you've been working on from a tutorial (or your own tutorial)!
Thanks for reading!
Cassie
Friday, August 16, 2013
5 Hexagon Project Tutorials
Here you will find a list of 5 of my favorite Hexagon projects and tutorials. As I've been perusing other people's blogs and work a lot lately, I thought I'd share these gems that I found. I have linked directly to the original post (or where I found it originally), and have done my best to give credit where credit is due.
 |
| Strip of Hexies Dish Towel by Wild Olive |
 |
| Eye Glass Case by Liesl Made |
 |
| Hexagon Park on Moda Bake Shop by Lily's Quilts |
 | |
| Hexagon Quilt Tutorial by The Sewing Chick |
 |
| Stitchy Hexie with Embroidery Pattern by Clover and Violet |
Thanks for reading,
Cassie
Labels:
DIY,
Hexagon,
Piecing,
Sewing,
Tutorials by others
Friday, July 26, 2013
Machine binding and the finished baby quilt
I did it! I finally finished a whole quilt all by myself! While it's not perfect, it is done. I did not expect perfect for my first quilt, anyway.
Here are links to a few things that helped me:
Machine binding tutorial at Cluck Cluck Sew
Tutorial for Baby Lattice Quilt Top
I also watched a free class on Craftsy from Elizabeth Hartman on creative quilt backs. :)
Lessons learned: don't machine quilt without the right presser foot. I'm both too broke, and unsure of where to buy the right foot. I'm uneasy buying one online because I can't find one that has my machine's model number specifically listed. So, until I can catch Wait's open, and I have the money for the walking foot, and darning/free-motion (still don't think I have the guts for that..), it looks like I'll be trying my hand at hand-quilting for the next one. I'll show you why in a minute...
The machine quilting/binding process I went through -
Quilting:
I decided to grid my quilt top. Using the regular straight stitch presser foot both cause bubbling in my fabric when stitches crossed and it caused a lot of shifting in the quilt top.
So before I machine quilt another quilt, I'll be getting the proper equipment. Other than that... it wasn't bad!
Binding:
I am so not used to taking pictures during any of my processes.. but I did manage to remember to take a few. :) If you want to know where I got the original tutorial that I read for machine binding it can be found here.
First, I started with the typical strips of fabric used for binding. I needed 5 strips joined to complete my quilt. I chose to use the same baby footprint fabric that is featured on my quilt back in the pieced strips and squares.
After squaring my quilt and trimming the excess back/batting, I pinned my binding strips to the edge and took it to my machine.
I was a little nervous about going over or under on my seam allowance on this. Though in hindsight, I shouldn't have been. I had plenty of room once I turned my binding to the back. I'll show you what I mean:
The stitch line on the top is after binding the back of the quilt. There's a good 1/4" - 3/8" difference there. Granted, this was my first corner, and I did improve as I went on, but still, good to know :)
Anyway, back to the process:
As you continue binding on the front side of the quilt and approach a corner, simply stitch to right before the end, and turn your fabric, as shown:
Start stitching at the very end again. I did a couple back-stitches since I know baby quilts go through the wash quite a bit.
After you finish binding the front turn the binding to the back and pin in place, especially around the mitered corners. :)
The tutorial says to stitch the back just to the left of the original stitch showing on the back from the front side. Since I don't have a walking foot, and I was fighting to keep everything lined up and feeding through my machine properly, I didn't manage this so well at the start. Again, after I got the feel for it, I improved.
Anyway, here are a few pictures of the finished baby quilt:
Full Quilt Top
Back detail and front corner turned.
Front detail and back corner turned.
Final dimensions are 45" x 37"
Thanks for reading!
Linking up with Crazy Mom Quilts for finish it up Friday! Hope to have another next week :)
- Cassie

Subscribe to:
Posts (Atom)


